Learn about the process of transforming your front or backyard into a maintenance free space with our Artificial Turf products.
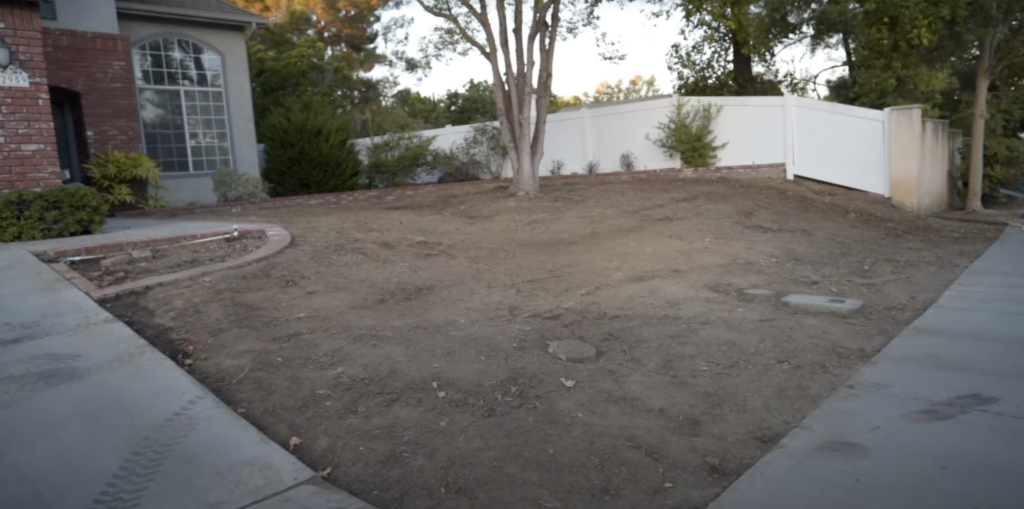
step 1: remove Existing grass
The first step in installing artificial grass is to remove the existing grass and any other vegetation from the area. This can be done using a sod cutter, a shovel, or other landscaping tools, depending on the size of the area and the type of grass.
step 1: remove grass
Remove the top four inches of your existing lawn and base, and then dispose of it according to local regulations. Soil builds up quickly, so we recommend having a dump trailer onsite.
step 2: add base Rock
After removing the existing grass, the next step in installing artificial grass is to add a base layer of crushed rock or gravel. This base layer provides stability and drainage for the artificial grass, ensuring that it does not shift or become uneven over time. The amount and type of base rock needed will depend on factors such as the climate, soil conditions, and intended use of the artificial grass area.
Once the base rock is installed, the next step is to add a weed barrier layer over it. A weed barrier is a geotextile fabric that prevents weed growth from underneath the artificial grass. It also helps to prevent soil erosion and promotes proper drainage. The weed barrier should be installed on top of the base rock and cut to fit the shape of the area. The edges should be overlapped and secured in place with landscape staples.
step 2: add base
Next, evenly spread three inches of class two road base over the area where you will be laying your turf. Road base will help us to create a level platform with proper drainage.
Lightly wet the area and go over it with a compactor to create a smooth base for laying the material.
Depending on your yard, you may want to add gopher wire and weed barrier to prevent vegetation and pests from sprouting through your new lawn. Weed barrier is NOT recommended if you have pets.
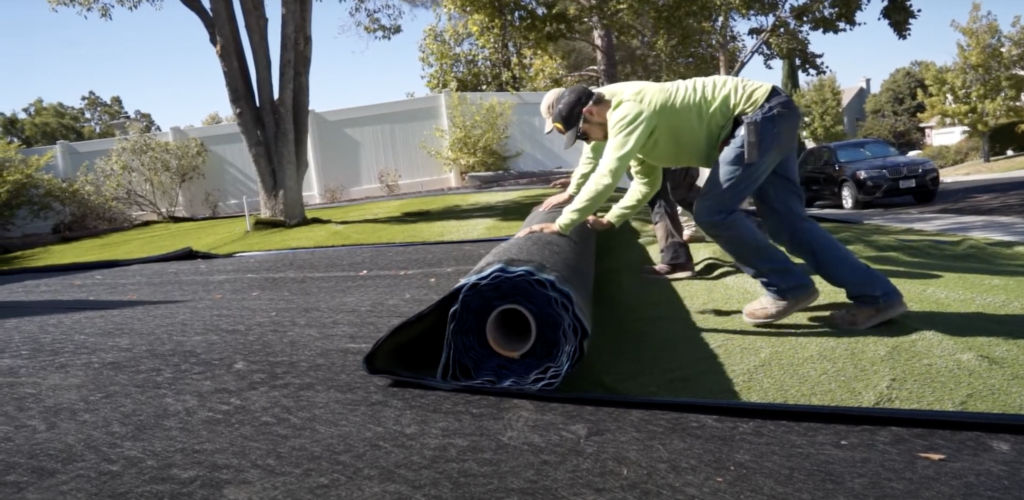
step 3: lay Your Artificial turf
After the weed barrier is installed, the next step in the artificial grass installation process is to lay the turf. This involves unrolling the turf and positioning it over the prepared area. It’s important to ensure that the turf is oriented in the right direction and that any seams are carefully joined together. The turf should be cut to fit the shape of the area using a utility knife or scissors. Once the turf is in place, it should be secured to the ground using landscape staples or adhesive.
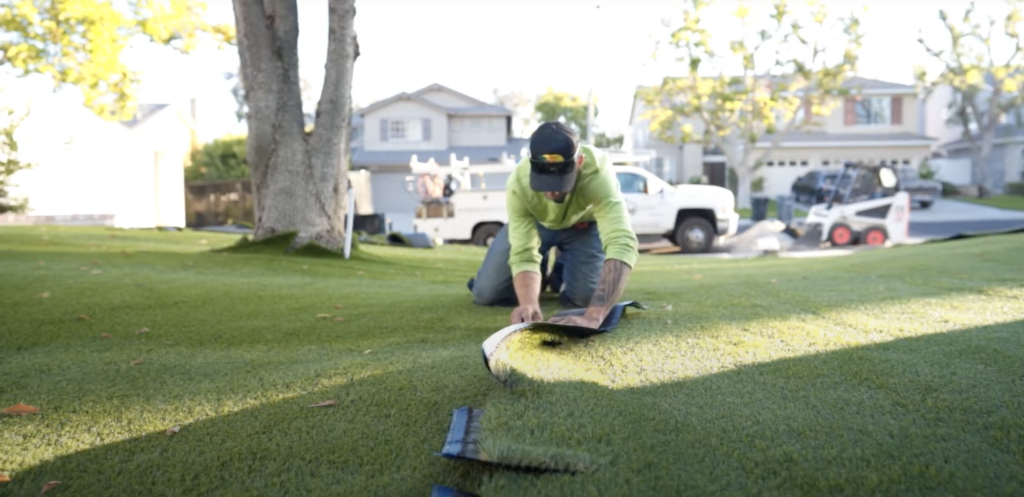
Next is the part we’ve all been waiting for… It’s time to lay your brand-new turf!
As you roll out your gorgeous new lawn, be careful not to let it drag across your freshly prepared base. We recommend letting grass sit in the sun for 30-60 minutes to expand. Make sure that the blades and stitch patterns are all facing the same way. Ignoring this would result in a poor looking lawn.
Use a carpet kicker to stretch and maneuver the turf into place.
Cutting the artificial grass to size is an important step in the installation process. This involves trimming any excess turf that extends beyond the edges of the area, as well as cutting the turf to fit around any obstacles such as trees or rocks. It’s important to make precise cuts to ensure that the finished installation looks neat and professional. A sharp utility knife or scissors can be used for this task, and the edges of the turf can be tucked under any existing landscape features such as flower beds or walkways.
step 4: cut to fit
Next, use a box cutter to fit your new lawn to the unique shape of your yard. Leave a quarter to half an inch of turf over the border to help with finishing touches.
Then secure the seams using seam tape and glue. Correctly fitting the seams together is essential to creating a pristine, natural looking yard. Make sure that the blades of each piece of turf are oriented the same way, and that space in between stitch rows match.
Place the red line of the seam tape squarely in the center of the seam. Then create an “S” pattern with the glue on each side of the red line. Move the turf into place and let the glue set.
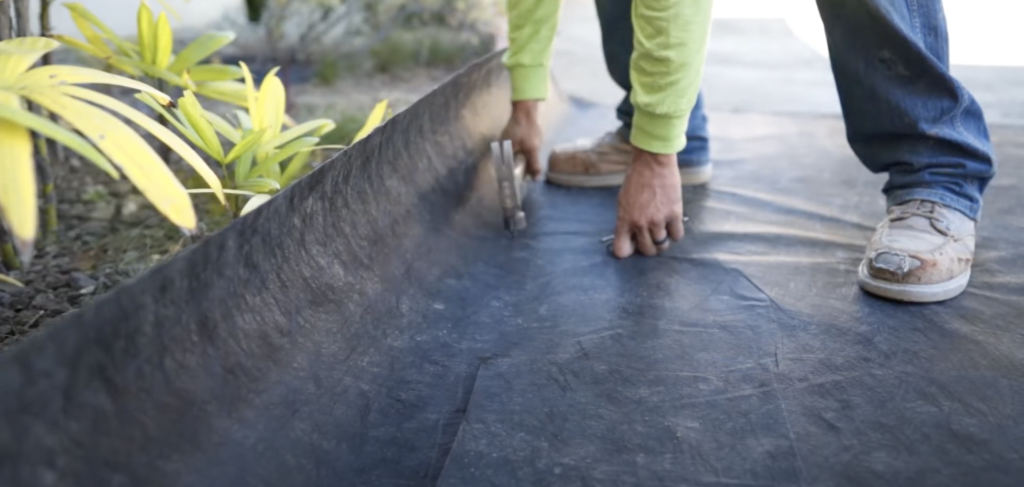
step 5: secure the perimeter
Securing the perimeter of the artificial grass is an important final step in the installation process. This involves using 5-inch non-galvanized nails to secure the edges of the turf to the ground, ensuring that it stays in place and does not shift or wrinkle over time. The nails should be spaced evenly along the edge of the turf, and should be driven through the backing of the turf into the base rock or soil below. Care should be taken not to overdrive the nails, as this can damage the turf or cause it to pull away from the ground.
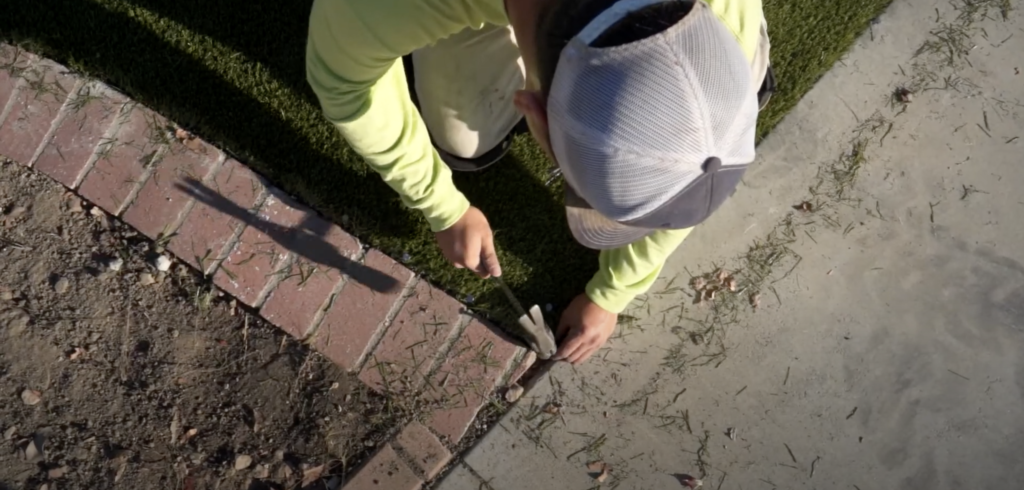
step 5: secure the perimeter
After tucking in the border with a putty knife and hammer, place 40-D 5-inch non-galvanized turf nails every six inches to secure your turf to its three inch base.
We recommend also placing a handful of nails along the seams to reinforce these areas. Then brush the turf with a power or push broom to stand the blades up straighter before adding infill. This will create a more vertical blade memory.
step 6: spread infill
Step 6 in installing artificial grass is to spread infill over the surface of the turf. Infill is a material that is added to the turf fibers to provide cushioning, support, and stability. The type and amount of infill used will depend on the specific application and the manufacturer’s recommendations. Some common types of infill include silica sand, rubber granules, and synthetic materials such as crumb rubber or acrylic-coated sand. The infill should be spread evenly over the turf using a drop spreader or other specialized equipment, and then brushed into the fibers to help distribute it evenly. This will help to create a natural-looking, well-supported surface that can withstand heavy use and foot traffic.
step 6: spread infill
Next it’s time to spread the infill! Adding the correct amount of infill will directly impact the appearance, performance, and life span of your lawn. Use a drop spreader to evenly disperse the proper amount of infill.
After the infill has been spread over the turf, the next step is to brush it into the fibers. This is an important step that helps to evenly distribute the infill and ensure that it is fully integrated into the turf. A power broom or stiff bristled brush can be used to work the infill down into the fibers, making sure to brush in all directions to ensure that the infill is evenly distributed. This will also help to create a more natural appearance and improve the performance and longevity of the artificial grass.
Once the infill is in place, use a power or push broom to brush the turf. This will stand the blades up straight and give your new lawn the appearance of freshly mowed grass. Lastly, rinse the grass to get rid of all remaining dust.
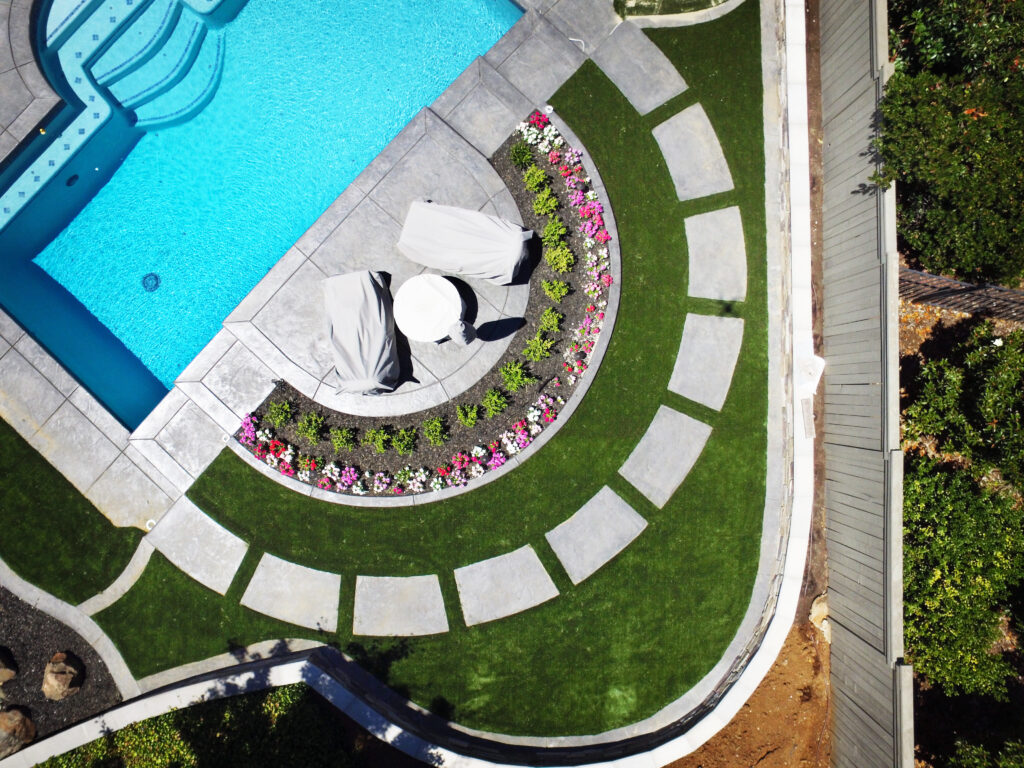
step 8: enjoy your lawn!
The final step in the artificial grass installation process is to sit back and enjoy your new lawn. Artificial grass requires very little maintenance compared to natural grass, so you can spend more time enjoying your outdoor space instead of mowing, watering, and fertilizing. With proper installation and care, your artificial grass lawn can provide many years of beauty and functionality, making it a smart investment for any home or business.
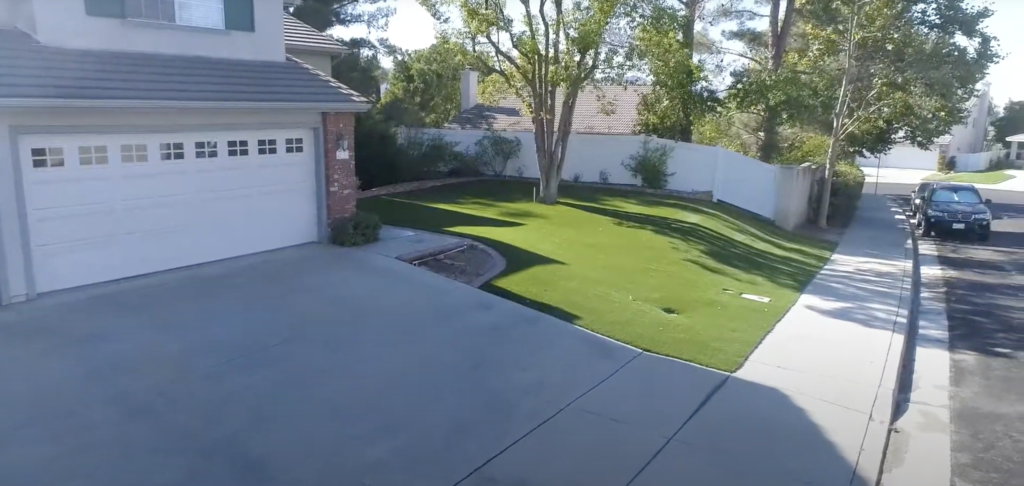
step 8: enjoy your lawn!
Once you’ve rinsed your lawn and packed up your equipment, all that’s left to do is kick back, relax, and enjoy your brand-new turf! You won’t have to worry about getting up early to mow ever again. The only necessary maintenance is brushing your lawn a couple times each year.
have a question about the process?
Let us know how we can help and we`ll be sure to get back to you, Thanks!